Vinyl Pitfalls: How a Poorly Aligned Cartridge is Secretly Ruining Your Records
Ask a room full of vinyl enthusiasts what makes the biggest difference to the sound of a turntable and you’ll hear several answers. Some will point to the tonearm, others to the phono stage, and a few will insist that the turntable itself is the most important component. Yet the part that actually touches the record and converts those microscopic groove movements into music is the phono cartridge. No matter how expensive the rest of the system may be, everything begins with that tiny assembly mounted at the end of the tonearm.
For many newcomers, cartridges can seem confusing. Prices range from the cost of a few LPs to the price of a small car, and the terminology—MM, MC, compliance, loading, Shibata, MicroLine—can feel like a foreign language. The good news is that the basic principles are not nearly as complicated as they appear. Once you understand what the cartridge is doing and why different designs exist, choosing the right one becomes much easier.
At its core, a phono cartridge is a converter. Speakers convert electrical energy into sound waves, while a cartridge does the opposite. As the stylus traces the groove of a record, mechanical motion is transformed into an electrical signal that can be amplified and sent to your speakers. Every cartridge design, whether moving magnet, moving coil, moving iron, or optical, is simply a different way of performing that conversion.
The Anatomy of a Phono Cartridge
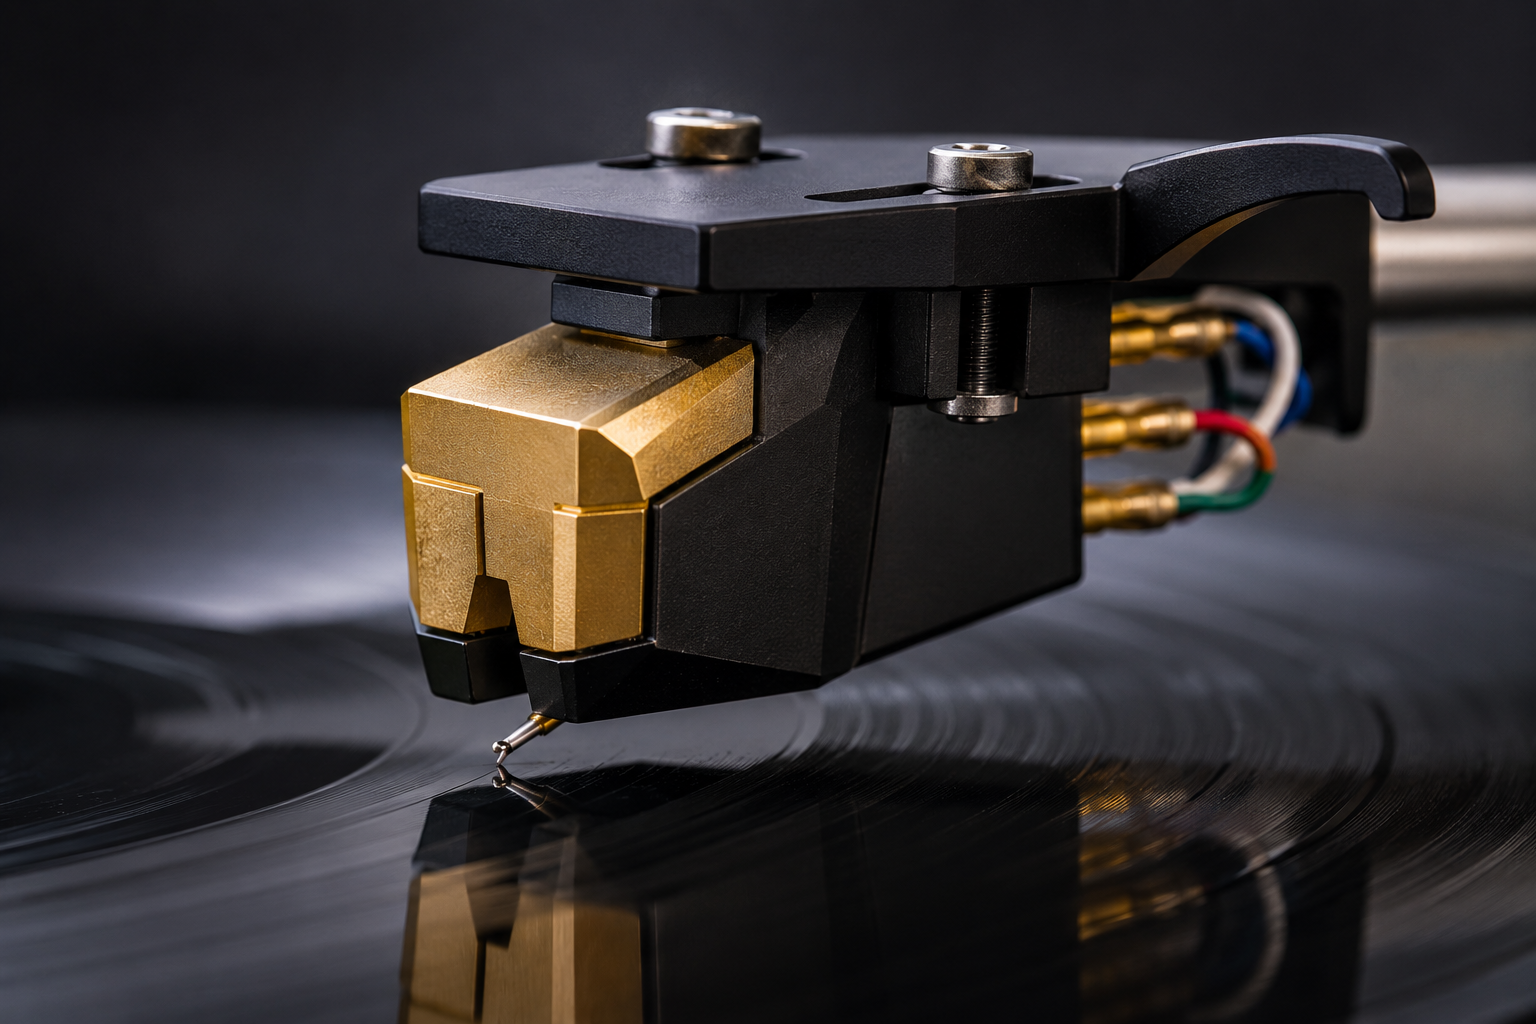
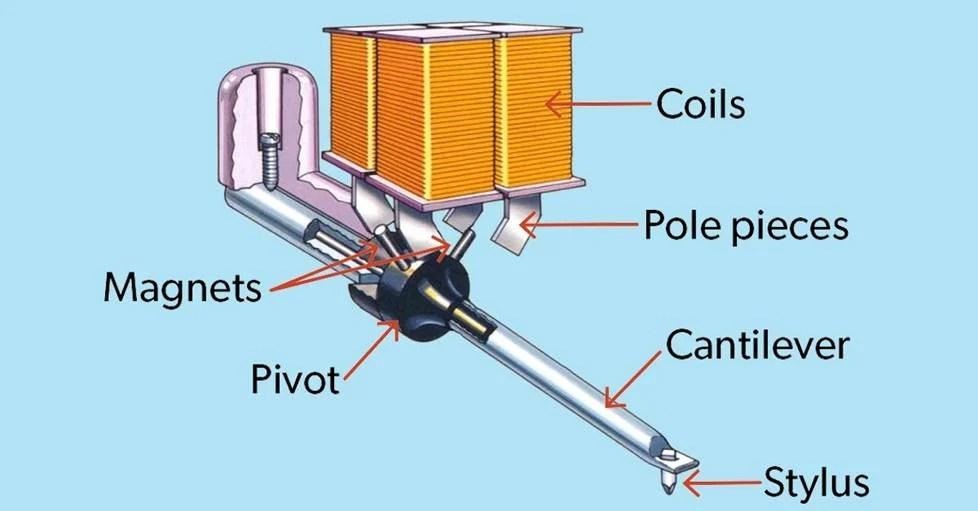
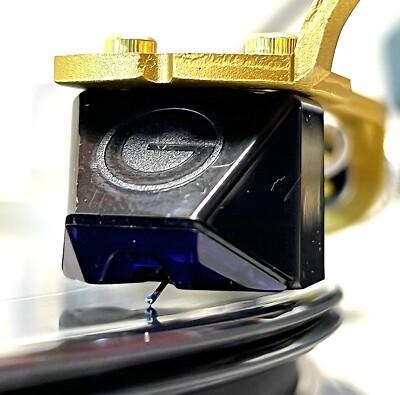
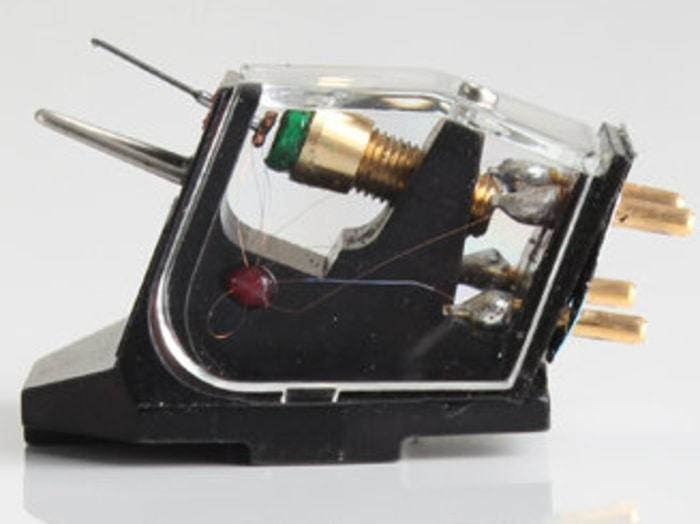
Although cartridges vary in design, most of them share the same basic components. The stylus is the diamond tip that sits in the groove. Attached to it is the cantilever, a lightweight tube or rod that transmits the stylus movement to the generator assembly inside the cartridge body. The suspension acts like a miniature shock absorber, controlling how freely the cantilever can move. Inside the body are either magnets, coils, iron elements, or optical components depending on the cartridge type. At the rear of the cartridge are the connection pins that carry the signal to the tonearm wiring.
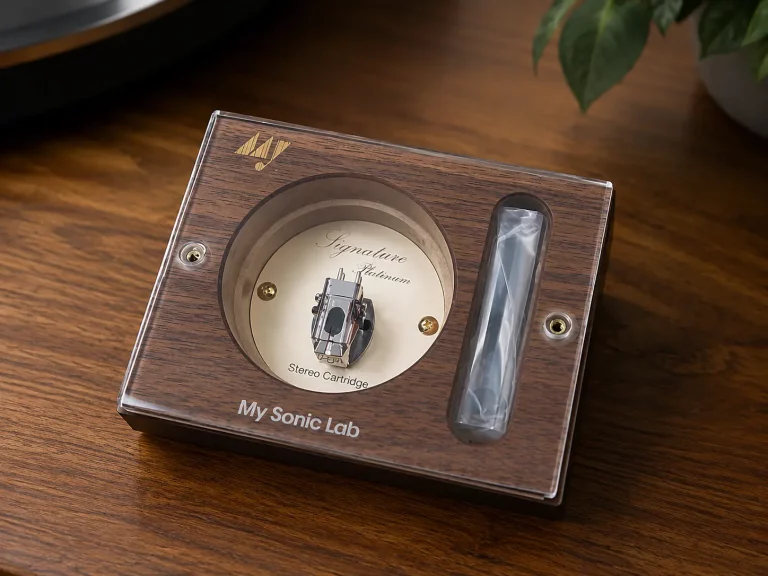
My Sonic Lab Signature Platinum Review: Yoshio Matsudaira’s Finest Cartridge Yet?
The stylus is the only part that actually touches the record, but it is the interaction between all of these components that determines the cartridge’s performance. A lighter cantilever can react more quickly to groove modulations, a well-designed suspension can improve tracking, and a low-mass generator assembly can reduce inertia. This is why cartridge design is such a balancing act. Improving one parameter often affects another.
How a Cartridge Reads a Record
A stereo record contains two channels of information cut into the walls of a single groove. As the record rotates, the stylus follows these microscopic variations. The movements are incredibly small—measured in microns—yet they contain all of the musical information.
When the stylus moves, the cantilever moves with it. That motion is transferred to the cartridge’s generator system, which produces a tiny electrical voltage. The signal is then sent to a phono preamplifier, where it is amplified and equalized before reaching the rest of the audio system.
The remarkable thing is that this entire process is purely mechanical and electrical. There is no digital conversion involved. The cartridge is essentially a precision measuring instrument capable of detecting minute movements while tracking a groove at a speed of roughly 20 inches per second at the outer edge of the record.
Moving Magnet (MM) Cartridges
The moving magnet cartridge is the design most vinyl listeners encounter first. In an MM cartridge, a small magnet is attached to the rear of the cantilever while fixed coils are mounted inside the cartridge body. As the stylus traces the groove, the magnet moves relative to the coils, generating an electrical signal.
One reason MM cartridges have remained popular for decades is their practicality. They typically produce a relatively strong output signal, usually between 3 and 6 mV, which means they work with almost any standard phono input. When the stylus wears out, replacement is often straightforward because the stylus assembly can usually be removed without replacing the entire cartridge.
Modern MM cartridges are far more sophisticated than many people realize. Advances in magnet materials, cantilever construction, and stylus profiles have allowed some moving magnet designs to achieve excellent detail retrieval and tracking performance. The old assumption that MM cartridges are automatically inferior to moving coils is no longer true.
Moving Coil (MC) Cartridges
A moving coil cartridge reverses the arrangement found in an MM design. The coils are attached to the cantilever, while the magnets remain fixed inside the body. Because the coils can be made extremely light, the moving assembly has less mass and can respond very quickly to groove modulations.
This low moving mass is one of the reasons MC cartridges developed a reputation for exceptional detail and transient response. Many audiophiles describe good moving coil cartridges as sounding more open, spacious, and refined.
Traditional low-output MC cartridges often produce only 0.2 to 0.5 mV, which is too little for a standard MM phono stage. They require either a dedicated MC phono preamplifier or a step-up transformer. High-output MC designs exist as well, generally producing around 1.5 to 2.5 mV, making them easier to use with a wider range of equipment.
The Quadratic MC-1 Step Up Transformer Review
For many years, the inability to replace the stylus easily was considered a major disadvantage of MC cartridges. While that is still true for many models, some modern moving coils now offer user-replaceable stylus assemblies.
MM vs. MC: Quick Reference
| Feature | Moving Magnet (MM) | Moving Coil (MC) |
| Output Voltage | High ($3.0 – 6.0\text{ mV}$) — standard phono input | Low ($0.2 – 0.5\text{ mV}$) — needs extra gain |
| Moving Mass | Higher ( heavier magnet on cantilever) | Extremely Low (tiny, lightweight coils) |
| Stylus Replacement | Easy (user-replaceable stylus assembly) | Difficult (requires factory rebuild/swap) |
| Best For | Budget flexibility, ease of use, beginners | Maximum detail retrieval, spacious soundstage |
4
Moving Iron and Other Magnetic Designs
Before moving magnet and moving coil cartridges became dominant, several other magnetic designs were developed. The most notable is the moving iron cartridge. Instead of moving a magnet or a coil, the cantilever moves a small iron element within a magnetic field. Because the iron element can be very light, moving iron cartridges can combine some of the advantages of both MM and MC designs.
Companies such as Grado have continued to refine moving iron technology, and many listeners appreciate the warm, natural presentation these cartridges can provide.
Another interesting variation is the Moving Micro-Cross design developed by Bang & Olufsen engineer Sabir Pramanik. It used a miniature cross-shaped moving element intended to improve channel separation and reduce moving mass. Although relatively uncommon today, it remains one of the more inventive cartridge designs ever produced.
Optical and Piezoelectric Cartridges
Not all cartridges rely on magnetism. Piezoelectric cartridges use a crystal or ceramic element that generates voltage when mechanically stressed. These designs were common in inexpensive record players decades ago because they produced a relatively strong output signal without requiring significant amplification. Their higher moving mass and limited fidelity eventually made them less popular for serious listening.
Optical cartridges take a completely different approach. Instead of generating electricity through magnetic movement, they use light. A light source shines through a tiny shutter attached to the cantilever, and the varying light intensity is converted into an electrical signal by a sensor. Modern optical systems from companies such as DS Audio have revived interest in this technology and demonstrated that optical cartridges can achieve extremely high performance.
Why Tracking Force Matters
The cartridge must maintain consistent contact with the groove, but it should do so with as little force as possible. Too much tracking force increases record wear, while too little can cause mistracking, distortion, and even more damage because the stylus loses proper contact with the groove walls.
In the early days of stereo LPs, tracking forces of 3 grams or more were common. Modern cartridges often track successfully at 1.5 to 2 grams, and some advanced designs operate even lower. The goal is not to achieve the lowest possible number, but to use the manufacturer’s recommended range and find the setting that provides stable tracking without excessive force.
Compliance and Tonearm Matching
One of the most misunderstood cartridge specifications is compliance. Compliance describes how easily the cantilever suspension moves. A high-compliance cartridge has a softer suspension and moves more freely, while a low-compliance cartridge has a stiffer suspension.
This matters because the cartridge and tonearm form a mechanical system with its own resonance frequency. If the resonance is too low, record warps and footfalls can excite the system. If it is too high, bass performance and tracking can suffer.
As a general guideline, low-compliance cartridges tend to work best with heavier tonearms, while high-compliance cartridges prefer lighter arms. Most modern cartridges fall into the medium-compliance range, which makes them compatible with a wide variety of contemporary turntables.
Understanding this relationship is often more important than choosing between MM and MC. A well-matched cartridge and tonearm combination will usually outperform a poorly matched setup regardless of cartridge type.
Cartridge Mounting Systems: Choosing the Right Fit
One of the first things many people discover when shopping for a cartridge is that not every cartridge fits every turntable. Fortunately, the industry has settled on a few mounting standards, and once you understand them, compatibility becomes much less intimidating.
The most common mounting system is the standard half-inch mount. If you’ve ever looked underneath a headshell and seen two screws securing the cartridge from above, you’ve already seen this system in use. Almost every serious turntable manufacturer has supported it for decades, making it the preferred choice for enthusiasts who enjoy experimenting with different cartridges. Because the cartridge position can be adjusted during installation, proper alignment is possible, allowing the stylus to follow the groove as accurately as possible.
During the 1980s another standard became popular, particularly on fully automatic turntables. Known as the P-Mount or T4P system, it simplified installation by allowing the cartridge to slide directly into the tonearm and lock into place with a single screw. Tracking force, overhang, and alignment were largely predetermined, making setup almost foolproof. Although P-Mount cartridges are less common today, many older turntables still rely on them, and replacement models remain available.
The Chord Electronics Huei Phonostage
Some manufacturers also produce integrated cartridge and headshell assemblies. These are designed specifically for particular tonearms and remove much of the guesswork from installation. While they offer convenience, they also limit upgrade options compared to a traditional half-inch mount.
Understanding the mounting system of your turntable should always be the first step before shopping for a new cartridge. Even the finest cartridge cannot perform properly if it simply isn’t compatible with the tonearm.
Output Voltage and Why It Matters
The electrical signal generated by a phono cartridge is incredibly small. Compared to the output of a CD player or modern streamer, the voltage coming from a cartridge is almost microscopic. This is why every turntable requires a phono preamplifier before the signal reaches the main amplifier.
Moving magnet cartridges generally produce between 3 and 6 millivolts, making them compatible with almost every standard MM phono stage. Their healthy output level is one reason they remain such a practical choice for both beginners and experienced listeners.
Moving coil cartridges are a different story. Traditional low-output designs often generate less than half a millivolt. While this allows engineers to reduce moving mass and potentially improve performance, it also means the signal requires significantly more amplification. A dedicated MC phono stage or a step-up transformer becomes essential.
High-output moving coil cartridges occupy the middle ground. They retain many characteristics of moving coil designs while producing enough voltage to work with many moving magnet phono stages. For listeners interested in trying MC technology without upgrading the entire system, these cartridges can be an attractive option.
Many people assume that higher output automatically means better sound, but that isn’t the case. Output voltage simply determines how much amplification is required. Excellent cartridges exist at every output level.
Cartridge Loading: An Overlooked Specification
Cartridge loading is one of those topics that rarely receives attention until someone upgrades to a more revealing system. Yet it can have a noticeable influence on tonal balance, dynamics, and overall presentation.
Every cartridge is designed to operate within a specific electrical environment. For moving magnet cartridges, that environment is usually a 47 kΩ input impedance combined with a recommended range of capacitance. When these values are significantly different from the manufacturer’s recommendation, the frequency response can change. High frequencies may become exaggerated, or the presentation may sound dull and lifeless.
Moving coil cartridges are even more sensitive to loading. Instead of using a universal value, different MC cartridges often require different impedance settings depending on their internal coil design. This is why many dedicated MC phono stages provide adjustable loading options.
Fortunately, most listeners don’t need to become electrical engineers. Following the cartridge manufacturer’s recommendations is usually enough to achieve excellent performance.
Stylus Profiles: The Smallest Part with the Biggest Responsibility
Every record player stylus performs the same basic task, but not every stylus contacts the groove in the same way. The shape of the diamond determines how much information can be retrieved from the groove and how gently the record is treated during playback.
The simplest design is the conical stylus. As its name suggests, its contact area is essentially round. This profile has been used since the earliest days of vinyl and remains popular because it is inexpensive to manufacture, durable, and relatively forgiving of minor alignment errors. Many entry-level cartridges continue to use conical styli for exactly these reasons.
Elliptical styli represented one of the first major improvements in cartridge technology. Instead of a perfectly round contact surface, the diamond is shaped to make contact with the groove over a slightly larger vertical area while remaining narrow enough to follow higher-frequency modulations more accurately. This allows elliptical styli to retrieve more detail while reducing record wear compared to many conical designs.
As vinyl playback continued to evolve, manufacturers developed increasingly sophisticated stylus shapes. Shibata, Line Contact, MicroLine, MicroRidge, Fine Line, Fritz Gyger, and several other profiles all share the same objective: increasing groove contact while reducing pressure on any single point of the record.
These advanced profiles are capable of tracing groove modulations that simpler styli may overlook. They often produce cleaner high frequencies, lower distortion toward the inner grooves, and noticeably improved tracking during demanding musical passages. Their larger contact area also distributes tracking force more evenly across the groove walls, helping to reduce wear when properly aligned.
The trade-off is that these sophisticated profiles demand far greater precision during setup. A cartridge fitted with a MicroLine stylus can deliver extraordinary performance, but only if alignment, tracking force, and azimuth are adjusted carefully.
Stylus Wear and Cartridge Lifespan
Every stylus wears with use. The diamond itself is incredibly hard, but after hundreds of hours of tracing vinyl grooves, even diamond begins to show signs of wear. Continuing to use a worn stylus not only reduces sound quality but can permanently damage records.
The lifespan varies depending on the stylus profile, the quality of the diamond, tracking force, and how clean the records are kept. A conical stylus may last around 500 hours under normal conditions, while a well-made MicroLine or Shibata stylus can often exceed 1,000 hours when properly maintained.
Clean records dramatically extend stylus life. Dust, grit, and dried contaminants effectively become abrasive particles that accelerate wear on both the stylus and the groove. Regular cleaning is one of the simplest and most cost-effective ways to protect an entire record collection.
It’s also important to distinguish between replacing a stylus and replacing a cartridge. Most moving magnet cartridges allow the stylus assembly to be replaced independently, making long-term ownership relatively affordable. Many moving coil cartridges, however, require professional rebuilding or complete replacement once the stylus reaches the end of its service life.
Why Expensive Doesn’t Always Mean Better
It’s easy to assume that a $2,000 cartridge will outperform a $300 model in every situation, but vinyl playback rarely works that way. Every component in the analog chain influences the final result, and the cartridge is only one part of a much larger system.
Installing a reference-grade moving coil cartridge on an entry-level turntable with a modest tonearm often produces disappointing results. The cartridge may be capable of extraordinary performance, yet the rest of the system cannot take full advantage of it. Conversely, a well-matched moving magnet cartridge on a carefully set up turntable frequently delivers a level of musical enjoyment that surprises even experienced listeners.
System balance has always mattered more than chasing specifications. A cartridge should complement the tonearm, the phono stage, and ultimately the listener’s musical preferences rather than simply carrying the highest price tag.
Getting the Most from Your Cartridge
Buying a quality cartridge is only half the equation. Even the finest cartridge available today can sound disappointing if it isn’t installed and adjusted correctly. Unlike most modern audio equipment, a phono cartridge isn’t simply plugged in and forgotten. It becomes part of a carefully balanced mechanical system where fractions of a millimeter and a few tenths of a gram can influence everything from channel balance to record wear.
Many people spend hundreds of dollars upgrading their cartridge only to discover that the improvement isn’t nearly as dramatic as they expected. In many cases the cartridge isn’t to blame. The real problem is that it has never been properly aligned. A modest cartridge that has been carefully installed will often outperform an expensive one that hasn’t.
The good news is that cartridge setup isn’t mysterious. It simply requires patience, accurate measurements, and an understanding of what each adjustment is designed to accomplish.
Cartridge Alignment
When a master lacquer is cut, the cutting head moves across the record in a perfectly straight line. A pivoted tonearm, however, follows an arc as it travels across the record. Because of this difference, the stylus can never remain perfectly tangent to the groove throughout the entire side.
Cartridge alignment is the process of minimizing this tracking error. By carefully positioning the cartridge within the headshell, engineers have developed alignment geometries that reduce distortion to extremely low levels across the record.
Several alignment systems exist, including Baerwald, Stevenson, and Lofgren. Each one places the points of minimum tracking error in slightly different positions across the record surface. None is universally “correct.” Instead, each represents a different compromise between distortion at the beginning, middle, and end of the record.
For most modern turntables, using the alignment geometry recommended by the manufacturer is usually the safest approach. Chasing theoretical perfection rarely produces audible improvements unless the rest of the system is already operating at an exceptionally high level.
Overhang
One specification that frequently appears in turntable manuals is overhang. It refers to how far the stylus extends beyond the center spindle when the tonearm is positioned directly over it.
Although the measurement is usually only a few millimeters, it has a significant influence on tracking accuracy. Too much overhang shifts the cartridge too far forward, while too little leaves it too far back. Either condition increases tracking error and can introduce audible distortion, particularly toward the inner grooves.
Fortunately, many turntable manufacturers include an alignment gauge or specify the correct overhang measurement in the owner’s manual. Taking a few extra minutes to verify this adjustment is well worth the effort.
Tracking Force
Every cartridge manufacturer specifies a recommended tracking force, usually expressed in grams. This isn’t merely a suggestion—it represents the range within which the suspension, cantilever, and stylus are designed to operate.
Many newcomers assume that using the lightest possible tracking force will reduce record wear. In reality, the opposite is often true. If the force is too low, the stylus can lose proper contact with the groove during loud musical passages. Instead of tracking smoothly, it bounces against the groove walls, causing distortion and potentially far more damage than slightly excessive tracking force.
Excessive force creates its own problems. The suspension becomes compressed, groove pressure increases, and long-term record wear accelerates unnecessarily.
For this reason, many experienced listeners begin near the middle or upper end of the manufacturer’s recommended range. Stable tracking almost always outweighs the theoretical advantage of running the lightest possible setting.
Using a digital stylus force gauge is one of the simplest upgrades any vinyl enthusiast can make. Modern electronic gauges are inexpensive, highly accurate, and eliminate much of the guesswork associated with mechanical balance scales.
Anti-Skate
As the record rotates, friction naturally pulls the tonearm toward the center of the platter. This force, commonly called skating force, causes unequal pressure on the two groove walls unless it is compensated.
Anti-skate mechanisms apply a gentle outward force that counteracts this tendency. When adjusted correctly, both groove walls receive approximately equal pressure, improving channel balance and reducing uneven stylus wear.
Anti-skate is often misunderstood because there is no universally perfect setting. The force changes continuously as the stylus moves across the record, and different records produce different amounts of friction. The manufacturer’s recommended setting usually provides an excellent starting point, but careful listening remains the best guide.
If one channel consistently distorts before the other during demanding passages, anti-skate adjustment is often one of the first things worth checking.
Vertical Tracking Angle (VTA)
Vertical Tracking Angle, commonly abbreviated as VTA, describes the angle at which the stylus sits in the groove when viewed from the side. Ideally, the playback stylus should mirror the angle used by the cutting stylus that originally created the record.
In practical terms, VTA is adjusted by raising or lowering the rear of the tonearm. Small changes can influence tonal balance, soundstage depth, and perceived clarity.
Some listeners become obsessed with achieving absolute perfection, making constant adjustments for every record thickness. While this approach may appeal to dedicated hobbyists, most systems perform exceptionally well once VTA is reasonably close to the intended angle.
It’s worth remembering that records themselves vary considerably in thickness. A setting that is technically perfect for one pressing may differ slightly for another, yet both can sound excellent.
Azimuth
Viewed from the front, the stylus should sit perfectly vertical within the groove. This alignment is known as azimuth.
If the cartridge leans slightly to one side, one groove wall receives more pressure than the other. The result may be reduced channel separation, poorer stereo imaging, and uneven stylus wear over time.
Some tonearms include azimuth adjustment, while others rely on precise manufacturing tolerances and offer no user adjustment at all. Unless measurements indicate a genuine problem, small visual differences should not become a source of unnecessary concern.
Tonearm Resonance
Earlier, we discussed compliance, but its importance becomes much clearer when viewed as part of the complete tonearm system.
Every cartridge and tonearm combination has a natural resonance frequency. Ideally, this resonance falls somewhere between approximately 8 and 12 Hz—low enough to remain outside the audible bass range but high enough to avoid being excited by record warps or footfalls.
A mismatch between cartridge compliance and tonearm mass can shift this resonance into undesirable territory. The symptoms may include exaggerated bass, mistracking, excessive arm movement, or reduced tracking stability.
Although resonance calculations appear intimidating at first glance, numerous online calculators make the process surprisingly straightforward. For anyone investing in a new cartridge, spending a few minutes confirming compatibility is time well spent.
Caring for Your Cartridge
A quality phono cartridge is a precision instrument. Although it spends its life tracing a groove measured in microns, it is surprisingly durable when treated properly. Most cartridge failures aren’t caused by manufacturing defects. They happen because of accidental damage, poor setup, or simple neglect.
The stylus deserves the most attention because it is the only part of the cartridge that makes direct contact with the record. Every time the record spins, dust, microscopic vinyl particles, and airborne contaminants begin to collect around the diamond. Left untouched, this buildup gradually changes the way the stylus sits in the groove. High frequencies lose their sparkle, distortion becomes more noticeable, and tracking performance begins to suffer.
Cleaning the stylus regularly doesn’t require expensive equipment. A dedicated stylus brush used with gentle strokes from the back of the cartridge toward the front is usually all that’s needed. Brushing sideways or pulling the brush toward the cantilever risks damaging the suspension, so patience is always better than force.
In recent years, gel-style stylus cleaners have also become popular. Instead of brushing the diamond, the stylus is gently lowered onto a soft cleaning pad that lifts away dust without placing stress on the cantilever. Both methods work well when used correctly, and neither should become an aggressive cleaning routine. A stylus doesn’t need to be scrubbed after every record, but keeping it clean pays dividends in both sound quality and longevity.
Clean Records Protect Everything
Many people focus entirely on the cartridge while overlooking the records themselves. In reality, a dirty record shortens stylus life just as quickly as a dirty stylus affects playback.
Dust acts like an abrasive. Every particle trapped in the groove passes beneath the stylus at considerable speed. Over time this increases wear on both the record and the diamond tip.
A carbon fiber record brush before each listening session removes loose surface dust and significantly reduces static electricity. Records that have accumulated years of dirt or fingerprints benefit from wet cleaning using a dedicated record cleaning solution or a record cleaning machine. Once properly cleaned and stored in high-quality inner sleeves, a record usually requires very little maintenance beyond occasional dust removal.
Keeping records clean is one of the least expensive improvements any vinyl enthusiast can make, yet it has one of the greatest long-term benefits.
How Do You Know When a Stylus Is Worn?
Unlike a worn tire, a stylus doesn’t provide obvious visual clues to the average eye. By the time wear becomes visible without magnification, replacement is usually overdue.
Fortunately, the ears often notice the warning signs first.
A cartridge that once tracked effortlessly may begin producing distortion during loud vocal passages or heavily modulated inner grooves. Cymbals can lose clarity, sibilance may become exaggerated, and instruments that previously sounded focused begin to lose definition.
These symptoms don’t always indicate a worn stylus, but if the cartridge has accumulated several hundred hours of use, replacement should certainly be considered.
Keeping a simple listening log is surprisingly helpful. Most enthusiasts remember when they bought a cartridge but rarely remember how many evenings they’ve actually spent using it. Recording approximate playing hours makes it much easier to plan for future replacement before damage occurs.
Common Cartridge Mistakes
Over the years, I’ve seen the same mistakes repeated by both beginners and experienced vinyl collectors. Fortunately, nearly all of them are easy to avoid.
One of the most common mistakes is assuming that a more expensive cartridge automatically produces better sound. Without a compatible tonearm and a suitable phono stage, much of that additional performance may never be realized.
Another frequent error is ignoring the manufacturer’s recommended tracking force. Setting the force below specification in the hope of protecting records often creates more damage through mistracking than simply following the recommended settings.
Alignment is another area where impatience becomes costly. Tightening the mounting screws before confirming overhang and alignment often means the cartridge is never positioned correctly. Spending an extra fifteen minutes during installation can reward you with years of better playback.
Stylus care is equally important. Accidentally brushing the stylus from front to back or handling the cantilever with fingers remains one of the quickest ways to ruin an otherwise perfect cartridge.
Perhaps the biggest mistake of all is forgetting that every part of the analog playback chain works together. The cartridge, tonearm, turntable, phono stage, and even the condition of the records themselves all influence the final result. Focusing on only one component rarely delivers the improvement people expect.
Choosing the Right Cartridge
The best cartridge isn’t necessarily the most expensive or the one receiving the highest praise online. It’s the one that complements both your equipment and your listening habits.
If you’re new to vinyl, a good moving magnet cartridge is difficult to beat. Installation is straightforward, replacement styli are widely available, and compatibility with most phono preamps is almost guaranteed. Modern MM cartridges offer excellent tracking, impressive detail, and years of reliable service without demanding constant attention.
Moving coil cartridges begin to make more sense as the rest of the system improves. A well-designed tonearm, a capable phono stage, and careful setup allow their strengths to become more apparent. They reward patience, but they also ask for a greater investment in both equipment and maintenance.
The most satisfying systems are rarely assembled by chasing specifications. They come from thoughtful component matching and realistic expectations.
A Few Brands Worth Knowing
The phono cartridge market has changed considerably over the decades, yet several manufacturers have consistently earned the respect of vinyl enthusiasts.
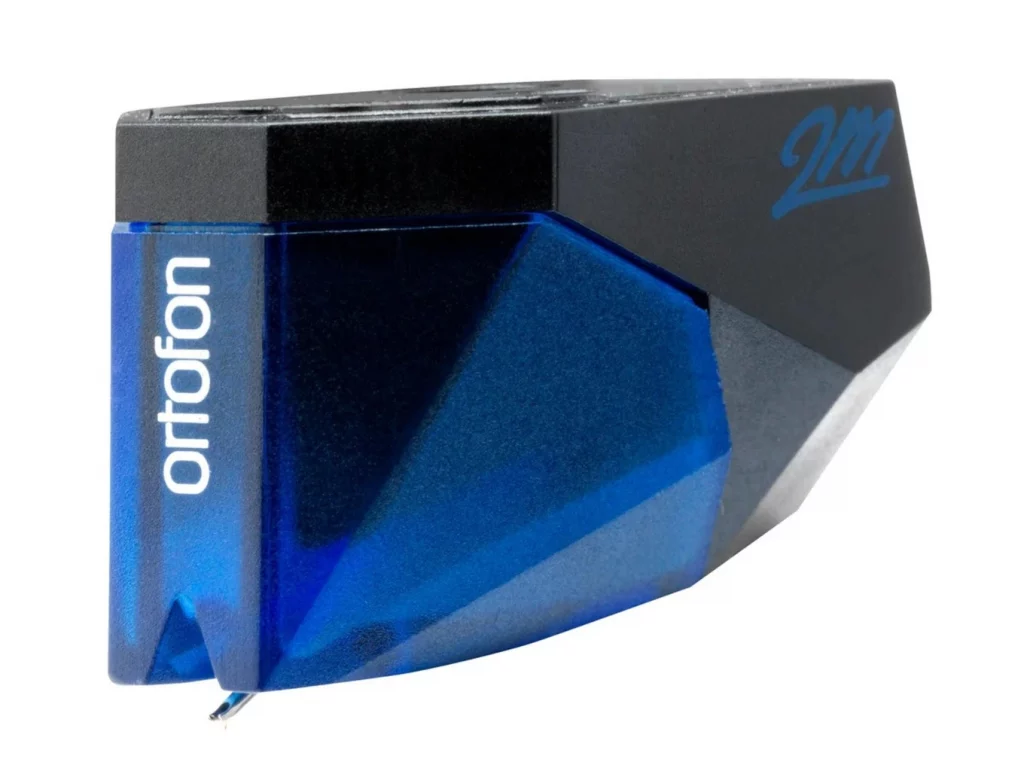
Ortofon has remained one of the industry’s most influential names, producing everything from affordable moving magnet cartridges to reference-grade moving coils used by demanding audiophiles around the world.
Audio-Technica has built an excellent reputation for offering exceptional value, particularly in the entry-level and midrange categories where many listeners begin their vinyl journey.
Nagaoka has earned a loyal following among listeners who appreciate a smooth, natural presentation that works well across a wide variety of music.
Sumiko, Hana, Grado, Denon, and Rega each bring their own philosophy to cartridge design, giving listeners an enormous range of sonic personalities to choose from.
No single manufacturer produces the perfect cartridge for everyone. Personal taste remains one of the most important parts of analog audio.
The Enduring Appeal of Vinyl
For decades the record industry assumed vinyl had reached the end of its story. Compact discs arrived, digital downloads followed, and streaming eventually became the dominant way people discovered music. Through all of those changes, the humble phono cartridge quietly continued doing exactly what it had always done—translating tiny movements in a spiral groove into music.
Perhaps that’s part of vinyl’s lasting appeal. There is something deeply satisfying about a playback system built entirely on precision engineering and simple physical principles. No software updates, no subscription fees, and no algorithms deciding what to play next. Just a stylus following a groove exactly as it was cut, allowing listeners to experience music in a remarkably direct way.
Understanding how a cartridge works doesn’t diminish that experience. If anything, it makes every record even more fascinating. Once you appreciate the engineering involved, it’s difficult not to admire how much information can be retrieved from a groove measured in fractions of a millimeter.
Whether you’re setting up your very first turntable or refining a system you’ve enjoyed for decades, the cartridge will always remain the heart of vinyl playback. Choose it carefully, install it properly, and look after it well. Do that, and it will reward you with thousands of hours of music while protecting the record collection you’ve spent years building.